We often sing You Are My Sunshine, and I used that as my inspiration for the bathroom. I wanted something fun and whimsical for this space, and it needed to be CHEAP!
Here's what I came up with...

I started with a blank 16x20 inch canvas. I picked up a package of 2 from Hobby Lobby. I think the package was originally $7.99 and I got it for 40% off, so the canvas ended up just being a couple of dollars. If you are a 'real' artist, please don't tell me how terrible cheap canvas' are. If my art starts to decompose in a few years, I'll come up with something new! And, if I decide to one day create some sort of masterpiece to last throughout time, I'll be sure to upgrade my canvas selection. Ha!
I started by painting the background of the canvas with acrylic paint mixed with some matte gel. The gel helps the paint to stretch a little farther, and it also gives the paint a little bit more dimension as it's applied. I used Thalo Green and Cerulean Blue.

This is the gel medium that I used. It's a little pricey, but a little goes a long way, and if you use a coupon or pick it up on sale, it's not so bad.

This is my fancy-schmancy artist palette. *wink* It's really just an old ice-cream lid. I dropped dollops of the Thalo Green and the gel on first.

Next, I mixed them up, but tried to leave some of the variance in color created when the paint and gel mix.

To lighten things up, I added a little Cerulean Blue.

Hopefully you can see some of the color dimension here, and the variances in the greenish-blueish colors I mixed.

I decided to use a circular 'pattern' as I applied the paint.

While the paint dried, I pulled out my alphabet stamps and some scrapbook paper to cut out the patterns and print out the words. You could also use different fonts on your computer to print words. I wanted a more random look to my canvas, so I was fine with the imperfections of using rubber stamps.

I used a small set of stamps to put 'are my' on a little piece of paper. I used these bigger stamps for the letters in 'sunshine'. I planned to cut them out, so I just randomly placed them on the paper. I love StazOn ink in Timber Brown. It's practically the only ink pad I use these days.

Here are my 'sunshine' letters all cut out.

I'm sorry I don't have pictures of how I cut out the rest of the pieces. It's not rocket science. I promise! The 'you' letters were just cut from a cute piece of alphabet scrapbook paper. You could use any type or combination of letters for your words. I didn't want things to look too uniform, and I used things I had on hand. I free-hand cut the sun and the little bird from scrapbook paper. If you wanted something more precise or exact, I'm sure you could use stencils, graphics found online, or even objects cut from a die-cutting machine like a Cricut or Silhouette.
I covered the entire canvas in Mod Podge and applied the first layer of papers. (*Make sure your paint is completely dry so things don't bleed!) I let that dry a bit, and then I added the other layers of paper to the sun and the bird, being careful all along to avoid wrinkles and bubbles in the paper. After everything was stuck in place, I finished with 4 or 5 more thin layers of Mod Podge. I knew the canvas would hang in the bathroom, so I wanted it to have a decent protective coat over all the papers.

You could go ahead and paint onto the edge of your canvas in the beginning, but I wanted to use ribbon around the edge. I used more Mod Podge to adhere the ribbon. I was sure the ends of the ribbon were relatively hidden on the bottom edge of the canvas. I singed the end of the ribbon so it wouldn't fray, and covered over the whole thing again with another layer of Mod Podge. Since the canvas was cheaper, there were a few uneven places that showed up when I was applying the ribbon. I just did my best to have things look smooth. I'm not too worried about small flaws...probably no one but me would ever even notice their existence!


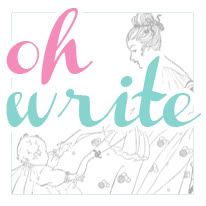
Here's the finished canvas!

And another angle...
 I had such a great time working on this piece. I'm thinking of the possibility of adding some other pieces of art like this to my Etsy store. Remember my Fruity Art? This felt like a slight variation of that project. I think I can only have so many of these types of things around my house without getting sick of the look, you know?
I'll be sharing my project over at these lovely blogs this week: